Vous pouvez regarder ce film traitant de «fpv racer» en streaming sur youtube.
Un sujet captivant traité par Vernel FPV à propos de « fpv racer ».
Cette vidéo, mise en ligne par Vernel FPV, est disponible sur Youtube.
explorant « fpv racer »:
En la découvrant, nous avons constaté que cette vidéo suscitait beaucoup d’intérêt. Le compteur de Likes indiquait: 27.
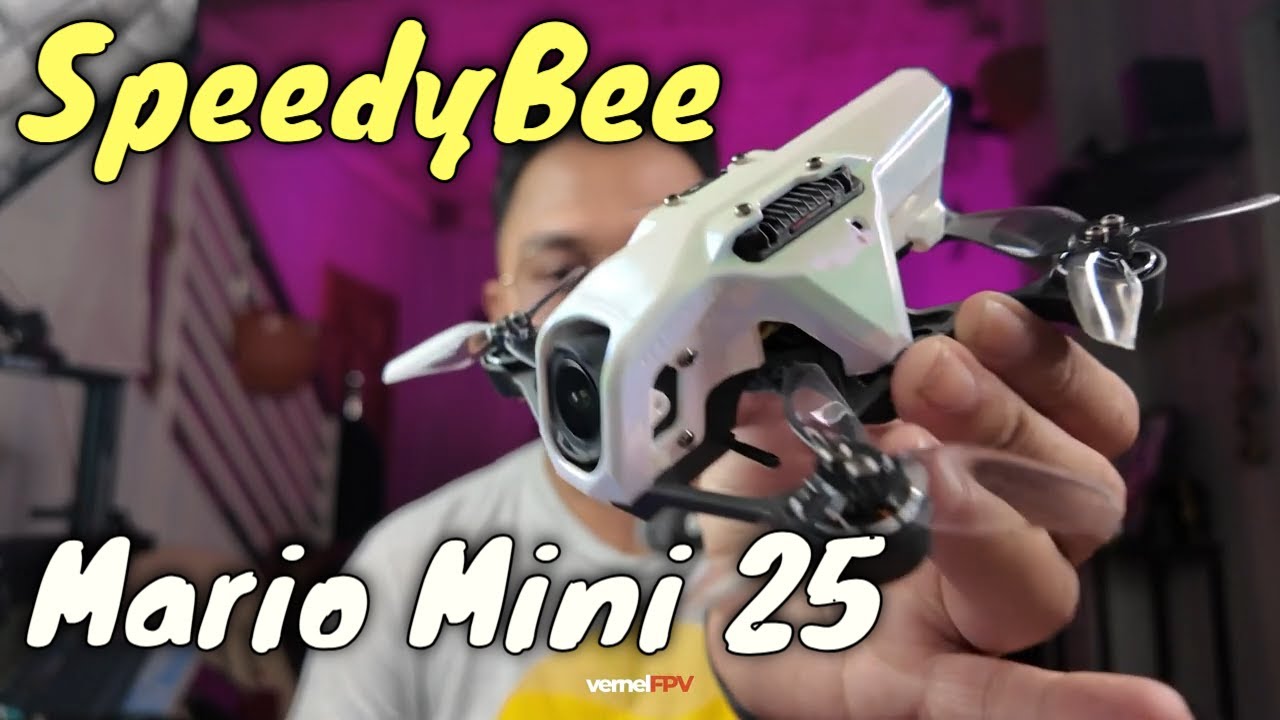
Il est important de noter la durée (00:17:02s), le titre (Test du SpeedyBee Mario Mini 25 avec DJI O4 Pro) ainsi que les éléments fournis par l’auteur, incluant la description :« Pour toute demande : vernelfpv@gmail.com Page Fan Facebook : https://www.facebook.com/vernelfpv/ Paypal : https://paypal.me/vernelfpv Gears : DJI Avata 2 : https://s.shopee.ph/4AgfxWWnDt BetaFPV Pavo20 Pro : https://bit.ly/3OvhHq2 Canon M50 : https://s.shopee.ph/7Kdhj5iwAd DJI Action 4 : https://s.shopee.ph/5potwdUFqu Radiomaster Boxer : https://bit.ly/4ga0cad Radiomaster Pocket : https://bit.ly/49a7Jne Lunettes HDZero : https://www.hd-zero.com/product-page/hdzero-goggle Lunettes Walksnail X : https://bit.ly/3BJEFXz une tasse de café : https://www.buymeacoffee.com/vernelv Lorsque vous achetez via mes liens d’conseil, je recevrai une petite commission sans frais supplémentaires pour vous. Cela aidera grandement la chaîne à se développer. ».
Grâce à ses fonctionnalités avancées, Youtube permet aux utilisateurs d’accéder à un large éventail de contenus tout en garantissant sécurité et confidentialité.
Une Coordination de Précision
Il est nécessaire d’avoir un apprentissage rigoureux pour piloter un drone FPV. Le FPV, contrairement aux drones avec stabilisation automatique, demande un contrôle manuel minutieux, particulièrement dans des situations de vol délicates. Il est habituel que de nombreux pilotes commencent par des simulateurs de vol ou des drones d’entraînement avant de se lancer dans des modèles plus avancés.
Le Drone FPV : Un Voyage Aérien Inoubliable
Avec le drone FPV (First Person View), l’expérience du vol télécommandé devient totalement immersive. Contrairement aux drones traditionnels, qui montrent l’environnement sur un écran de contrôle, le drone FPV envoie directement ce qu’il observe au pilote via une caméra intégrée. L’image est reçue en temps réel sur des lunettes ou un écran, offrant au pilote une sensation de vol immersive, comme s’il était à bord de l’appareil.
L’Agilité du Drone FPV
Un des points forts des drones FPV est leur capacité à évoluer rapidement. Avec une conception axée sur la réactivité, ils fournissent une maniabilité qui surpasse celle des drones conventionnels. Cette fonction est essentielle pour les compétitions et pour la capture d’images dans des espaces restreints, comme les forêts, les montagnes ou les structures urbaines complexes.
Pour résumer
La notion de vol télécommandé est dépassée par le drone FPV. En associant une technologie de pointe à un pilotage précis, il procure des émotions fortes aux passionnés. Que ce soit pour l’exploration scientifique, les événements culturels ou les campagnes publicitaires, ces drones élargissent notre compréhension, offrant des perspectives fascinantes et une expérience inoubliable.
Les Rôles du Drone FPV
Les compétitions de drones attirent de nombreux fans du drone FPV. Ces événements, où la vitesse et l’exactitude sont essentielles, se déroulent sur des circuits complexes nécessitant une maîtrise parfaite du pilotage. En raison d’une agilité remarquable, les pilotes doivent contourner les obstacles, prendre des virages serrés et s’adapter sans délai aux changements de cap.
En matière de photographie et de vidéographie, ces drones sont révolutionnaires, au-delà de leur utilisation pour les courses. Ils réussissent à capturer des images extraordinaires dans des lieux inaccessibles ou dans des situations où les techniques traditionnelles sont limitées. Ils sont couramment utilisés pour enregistrer des scènes d’action, des sports extrêmes, ainsi que pour des productions cinématographiques et des documentaires.
Personnalisation : Performances
Les drones FPV se caractérisent aussi par leur forte aptitude à personnaliser. Pour chaque pilote, il est possible de configurer différents éléments, tels que la caméra, les moteurs et les contrôleurs de vol, afin d’optimiser l’expérience selon ses préférences et besoins spécifiques. Grâce à cette flexibilité, on peut améliorer la performance ainsi que la qualité des prises de vue.
Ce lien vous permet de voir la vidéo sur youtube :
la publication originale: Cliquer ici
#Test #SpeedyBee #Mario #Mini #avec #DJI #Pro
Retranscription des paroles de la vidéo: Hello everyone. We got a guest which is a bit shy. So in this video we will talk about the Mario Mini 25. This came from SpeedyB. So we will try to see the content of this box. Very very small. Everything is packed in a very small box. We will try to see the design decisions that PDB made in terms of the board and some let’s just try to see how they design the canopy. Yes, I already ate that chocolate. Okay, so where was I? is in a normal propeller orientation similar with the every style drone also. Yes. You eat you eat that. Okay. You get that. Okay. [Applause] Huh? So, let’s go. Let’s look at the content of this box. So, this is the Mario Mini 25 from SpeedyB. Very simple box and a very small one. Open this up so we can see the Mario Mi inside. Leaflets for the Speed DB app. Here’s some accessories. some HQ props. This is the model RT 2.5x 2.1 by3 PDB branded screw wires. You also got some motor pins here. You got this canopy for the GPS here. some extra screws and of course an extra strap. Be before that, let’s look at the design of the Mario Mini. It reminds me of the Avat based on the design of the frame. Weirdly enough, they say this is plastic, but it is quite hard. I’m not sure how they did this or if it is actually carbon fiber. I do not know, but it is quite stiff. Meanwhile, this canopy is small soft, a bit soft, but of course, it is durable as well. SpeedDB want this to be a plug-andplay solution for the VTX. Then you will notice that this will disengage as well. And then from there, but then you just remove it from the top three different holes. This is for the O4 Pro. This is for the O4 Lite. Now for the GPS, you need to use the GP12 GPS, although it is not included in this kit. You would place that very small GPS on top here via a tape flight controller. and it is differently designed. It is an all-in-one solution. What they want is for you to have a plug-and-play solution for the DJI O4 Air unit. You don’t need to solder. Of course, the GPS is plug-and-play as well. You don’t you’ve got other slots for your LED. This price point, you have a Bluetooth receiver here. And this actually is the antenna for the Bluetooth. Another thing is they actually put a beeper together with this flight controller. It’s actually at the bottom part. I hope you could see it. This is the beeper that is presoldered on the flight controller. The type-C is presoldered as well. There is a very good way to put the battery here. You actually just have to place it here. Then this connector to protect it. You could actually put it here. So the lead is protected as you the the plug here. The flight controller is not designed in a standard way. It’s quite unlikely because it is in a you could call a key design or speed design. So everything is placed here. Instead of doing two stacks or putting a bigger flight controller, what they did is they they they put everything here the ESC then. So if ever you will have a problem, something blows out, you have to get it directly from SpeedB. How the the motor is placed? I think they solder it while the the motors are mounted because there is no way for you to remove the motor unless you desolder all of this points. So if ever one of your motor blows out, you have to desolder everything and remove the motor and much easier. But some people do say that there’s actually a resistance when you have the plug unlike if you solder it directly to the flight controller. So those are the things that you have to consider between the two. What I just don’t like is you cannot actually lift this flight controller without removing your motors through this solder. So, I was planning actually to to waterproof this flight controller and I don’t know how. Before we put this O4 Pro in this canopy, let’s just see the different design decision that Beta FPV did with the Mario Min speedb. As you can see, they are both quick release system. And you could put this on the different frames of beta FPV, Pavo 20, Pavo Pico if you want a soft mounts which dampens your flight. I’m not sure if there is a way for this to dampen as well or I think there is a dampener directly on top of the motors that dampens the flight and this one is much smaller than this. So before you could mount the Over Pro, you have to prepare it first. use this to antenna holder. We will use this four screw to to mount this. So as I said it is weird because you have to put the antenna this way. Okay. So this is how the over pro would look like after you put the antenna on. So this is how it looks like with the battery on. So let’s try to weigh this in. Okay, without the battery it is around 127.19 g 530 milliamp GNB 165 g. So let’s try to configure this through the app. So I downloaded it. So very similar to how Betaflight is layout. Okay. So you have your ports here config. So I have to change the name and my name can save and reboot. [Music] Okay. Next. Do not touch that. batteries, filters, tuning. This is the pin tune. So, you may want to save this up just in case you need to to recover this. Okay. Then the rate profile is default. So, we’ll be flying with the Mario Mini. The Mario Mini. [Music] Okay. You should have noticed the drone is too too light. See? See? So agile as well. [Music] All right. [Music] [Applause] Another flight. I’m hearing a squeak with the motor. Okay, let’s do it again. Let’s see if you could hear that squeaky sound. [Music] Hear that? [Music] It’s not that there when you turn or probably because of the wind. I’m not sure. It’s the effect of the wind on the motor. Yeah. Canopy. [Music] Oopsie. [Music] It is in the tree. Hey. Oh, there you go. I caught it. Very small. Very light. Oh my god. It’s too light. Really? It is too light. Very very light and nimble. The wind is very strong as you can see. Ooh, not difficult for this drone. So, we now found the spot to fly. Oh, this is a safe spot. That is the flight performance of the Mario Mini 25. It flies really well and I’m very very light on the throttle stick. So I I think I need 20 to 30% just to hover for the squad. You could hear my my thoughts as I was flying this drone. It flies really quickly. It’s agile also. Yes, there are a couple of design choices that I’m not keen to but it is what it is. This is how SpeedGB designed this. One of which is this XT30 plug. Although it’s a good thing that it is stuck here. It’s not moving anywhere. But the problem is if you have a very short lead on all of your batteries, you will have a hard time plugging in to this XT30. This 3S battery from G&B has a very short lead. Although long enough if I’m using a different quad like the Pavo 20 Pro. problem is if you try to put it here is quite short and you have to really make an effort plug it in your lead will be bent. Another thing is I’m hearing that squeaky sound all the time. I’m not sure if it is caused by a motor is hitting this protector, this motor protector. And every time I do a turn it squeaks something like it is bending because of the inertia or this since it’s quite close to the propeller every time you do a turn it is causing that sound or probably this hole going to the canopy. Another thing is this strap it is not doing its job even if I try to make it very very tight. What I did is I used this Flyu strap that I have for my Firefly 1.6. So, I use this. It holds the battery really well and it’s quite thicker than the Mario Minis. I have mixed feelings on the the board. It’s a good thing that everything is in that all-in-one board, but of course, if you have a problem down the road, one minor component that is problematic, you have to replace the whole board. Another thing is the motors are soldered to the flight controller while it is placed in the frame. There is no other way for you to remove the motor without the soldering flight controller. If you have to replace a motor, you have to desolder that motor. I I think this quick release is useless if you are unable to use this quick release on different size of quad because what happens here is you can only use this canopy on another Mario Mini. I was hoping that this could be put on probably a Mario 5 or the Mario 5 canopy can be placed here. You mean so you could you don’t need to buy couple of VTXs for different sizes of quads. That is a quick release system. For example, the Pavo 20 Pro, you could just actually put remove this, put this on a Pavo 20 and put it on a Pavo Pico. And what else did we forgot? Pavo Fento. You could just put this because it is a quick release system. I was hoping it is the same for the Mario Mini or probably SpeedyB is trying to make couple of different sizes that will house this quick release system. This is the only probably the first one that they will release. Hopefully because that is what Beta FV did before for the Pavo Pico, right? So hopefully as we go on they will use utilize this quick release system. But nevertheless, it flies really well. I haven’t done any freestyle because I had a bad experience. Probably I’ll talk about it on another video. So I’m so my fingers are not that as it used to be wherein I just want to fly and flick and flick. So I do apologize if there is no freestyle movement that I did on this video for the Mario Mini. Just let me recuperate and I’ll try to to do a couple of videos about Mario Mini more. Let’s try to do some flight. But nevertheless really really good. probably the 2.5 in propeller is giving it enough power in efficiency. So you could fly it really really long and you there is no actual problem while you fly this because it is in a freestyle configuration but there is a bit of prop wash as you dive. I’m not sure if there is a need to adjust the pid tuning of this. I was happy with the flight. So that is the Mario Mini 25 and as always see you in the next video. Happy flying and take care. Bye-bye. .
Déroulement de la vidéo:
0.16 Hello everyone.
4.16 We got a guest which is a bit shy. So in
8.16 this video we will talk about the Mario
10.16 Mini 25. This came from SpeedyB. So we
14.16 will try to see the content of this box.
17.039 Very very small. Everything is packed in
19.92 a very small box. We will try to see the
22.96 design decisions that PDB made in terms
25.439 of the board and some let’s just try to
28.64 see how they design the canopy.
35.52 Yes, I already ate that chocolate.
39.76 Okay, so
43.68 where was I? is in a normal propeller
47.44 orientation similar with the every style
50.879 drone also. Yes.
55.12 You eat you eat that.
58.64 Okay. You get that.
61.76 Okay.
70.85 [Applause]
72.799 Huh?
77.759 So, let’s go. Let’s look at the content
79.92 of this box.
81.92 So, this is the Mario Mini 25 from
84.799 SpeedyB.
88.32 Very simple box and a very small one.
91.92 Open this up so we can see the Mario Mi
97.04 inside. Leaflets for the Speed DB app.
100.32 Here’s some accessories.
103.439 some HQ props. This is the model RT 2.5x
110.479 2.1 by3 PDB branded
114.799 screw
117.439 wires. You also got some
121.28 motor pins here. You got this
125.439 canopy for the GPS here. some extra
130.399 screws and of course an extra
134.64 strap. Be before that, let’s look at the
138.08 design of the Mario Mini. It reminds me
142.879 of the Avat
147.2 based on the design of the frame.
151.92 Weirdly enough, they say this is
154.8 plastic, but it is quite hard. I’m not
158.959 sure how they did this or if it is
161.84 actually carbon fiber. I do not know,
166.08 but it is quite stiff. Meanwhile, this
169.76 canopy is small soft, a bit soft, but of
173.12 course, it is durable as well. SpeedDB
177.92 want this to be a plug-andplay solution
181.04 for the VTX.
185.12 Then you will notice that this will
187.92 disengage as well. And then from there,
190.72 but then you just remove it from the top
194.48 three different holes. This is for the
197.44 O4 Pro. This is for the O4 Lite. Now for
200.159 the GPS, you need to use the GP12 GPS,
203.68 although it is not included in this kit.
205.68 You would place that very small GPS on
208.879 top here via a tape flight controller.
213.04 and it is differently designed. It is an
216.4 all-in-one solution. What they want is
218.799 for you to have a plug-and-play solution
220.64 for the DJI O4 Air unit. You don’t need
224.159 to solder. Of course, the GPS is
227.68 plug-and-play as well. You don’t you’ve
230.159 got other slots for your LED. This price
234.319 point, you have a Bluetooth receiver
238.319 here. And this actually is the antenna
242.4 for the Bluetooth. Another thing is they
245.36 actually put a beeper together with this
249.04 flight controller. It’s actually at the
250.799 bottom part. I hope you could see it.
253.04 This is the beeper that is presoldered
257.6 on the flight controller. The type-C is
260.479 presoldered as well. There is a very
263.68 good way to put the battery here. You
266.56 actually just have to place it here.
268.96 Then this connector to protect it. You
271.759 could actually put it here. So the lead
274.96 is protected as you the the plug here.
278.56 The flight controller is not designed in
282.08 a standard way. It’s quite unlikely
285.6 because it is in a
289.919 you could call a key design or speed
292.56 design. So everything is placed here.
296.8 Instead of doing two stacks or putting a
300.0 bigger flight controller, what they did
302.16 is they they they put everything here
305.28 the ESC then.
308.0 So if ever you will have a problem,
310.639 something blows out, you have to get it
314.0 directly from SpeedB. How the the motor
316.88 is placed?
320.96 I think they solder it while the the
324.16 motors are mounted because there is no
326.72 way for you to remove the motor unless
328.56 you desolder all of this points. So if
331.6 ever one of your motor blows out, you
334.24 have to desolder everything and remove
337.039 the motor and much easier. But some
341.28 people do say that there’s actually a
343.68 resistance when you have the plug unlike
346.96 if you solder it directly to the flight
350.88 controller. So those are the things that
353.44 you have to consider between the two.
357.12 What I just don’t like is you cannot
359.759 actually lift this flight controller
362.72 without removing your motors
366.72 through this solder. So, I was planning
370.0 actually to to waterproof this flight
374.0 controller and I don’t know how. Before
376.4 we put this O4 Pro in this canopy, let’s
380.479 just see the different design decision
383.6 that Beta FPV did with the Mario Min
387.919 speedb.
389.44 As you can see, they are both quick
392.56 release system. And you could put this
394.0 on the different frames of beta FPV,
397.28 Pavo 20, Pavo Pico if you want a soft
400.4 mounts
402.4 which dampens your flight. I’m not sure
405.52 if there is a way for this to dampen as
408.319 well or I think there is a dampener
411.44 directly on top of the motors that
413.919 dampens the flight and this one is much
416.88 smaller than this. So before you could
419.36 mount the Over Pro, you have to prepare
421.36 it first. use this
424.88 to
426.4 antenna holder. We will use this four
428.56 screw to to mount this. So as I said it
432.4 is weird
434.08 because you have to put the antenna this
437.12 way. Okay. So this is how the over pro
439.84 would look like after you put the
442.479 antenna on. So this is how it looks like
447.84 with the battery on.
451.199 So let’s try to weigh this in. Okay,
453.12 without the battery it is around
458.72 127.19
460.24 g 530 milliamp GNB
466.88 165 g. So let’s try to configure this
471.28 through the app. So I downloaded it. So
475.28 very similar to how Betaflight is
478.319 layout.
479.919 Okay. So you have your ports here
488.08 config.
490.08 So I have to change the name and my name
496.319 can save and reboot.
500.44 [Music]
503.52 Okay. Next.
506.8 Do not touch that. batteries, filters,
510.8 tuning. This is the pin tune. So, you
513.279 may want to save this up just in case
516.08 you need to
520.0 to recover this.
524.0 Okay. Then the rate profile is default.
526.8 So, we’ll be flying with the Mario Mini.
530.64 The Mario Mini.
534.26 [Music]
536.0 Okay.
539.76 You should have noticed the drone is too
542.959 too light.
544.72 See?
547.92 See?
557.92 So agile as well.
562.0 [Music]
563.839 All right.
575.45 [Music]
587.71 [Applause]
589.76 Another flight.
591.92 I’m hearing a squeak
595.6 with the motor.
597.76 Okay, let’s do it again. Let’s see if
600.32 you could
602.16 hear that squeaky sound.
605.28 [Music]
609.12 Hear that?
610.64 [Music]
613.6 It’s not that
616.959 there when you turn or probably because
620.32 of the wind. I’m not sure.
622.8 It’s the effect of
625.839 the wind on
629.04 the motor. Yeah. Canopy.
635.7 [Music]
659.6 Oopsie.
666.53 [Music]
669.04 It is in the tree.
676.16 Hey.
678.0 Oh, there you go. I caught it.
688.24 Very small. Very light. Oh my god. It’s
692.079 too light.
694.48 Really?
710.079 It is too light.
713.44 Very very light and nimble.
719.2 The wind is very strong as you can see.
721.2 Ooh,
723.519 not difficult for this drone.
734.88 So, we now found the spot to fly.
738.56 Oh, this is a safe spot.
745.68 That is the flight performance of the
748.24 Mario Mini 25. It flies really well and
752.88 I’m very very light on the throttle
755.36 stick. So I I think I need 20 to 30%
758.16 just to hover for the squad. You could
760.32 hear my my thoughts as I was flying this
762.8 drone. It flies really quickly. It’s
764.48 agile also. Yes, there are a couple of
766.72 design choices that I’m not keen to but
769.839 it is what it is. This is how SpeedGB
772.639 designed this. One of which is this XT30
776.56 plug. Although it’s a good thing that it
779.04 is stuck here. It’s not moving anywhere.
781.76 But the problem is if you have a very
783.839 short lead on all of your batteries, you
786.0 will have a hard time plugging in to
788.32 this XT30. This 3S battery from G&B has
792.48 a very short lead. Although long enough
794.32 if I’m using a different quad like the
796.56 Pavo 20 Pro. problem is if you try to
798.959 put it here is quite short and you have
801.76 to really make an effort plug it in your
804.0 lead will be bent. Another thing is I’m
806.88 hearing that squeaky sound all the time.
809.839 I’m not sure if it is caused by a motor
813.44 is hitting this protector, this motor
816.639 protector. And every time I do a turn it
820.0 squeaks something like it is bending
822.399 because of the inertia or this since
825.2 it’s quite close to the propeller every
828.48 time you do a turn it is causing that
830.959 sound or probably this hole going to the
835.36 canopy. Another thing is this strap it
839.6 is not doing its job even if I try to
842.56 make it very very tight. What I did is I
846.32 used this Flyu strap that I have for my
849.36 Firefly 1.6. So, I use this. It holds
852.24 the battery really well and it’s quite
854.24 thicker than the Mario Minis. I have
856.8 mixed feelings on the the board. It’s a
860.639 good thing that everything is in that
863.44 all-in-one board, but of course, if you
866.16 have a problem down the road, one minor
869.519 component that is problematic, you have
872.24 to replace the whole board. Another
874.88 thing is the motors are soldered to the
877.68 flight controller while it is placed in
880.48 the frame. There is no other way for you
882.72 to remove the motor without the
885.36 soldering flight controller. If you have
887.6 to replace a motor, you have to desolder
890.959 that motor. I I think this quick release
894.56 is useless if you are unable to use this
898.639 quick release on different size of quad
901.44 because what happens here is you can
903.6 only use this canopy on another Mario
906.639 Mini. I was hoping that this could be
908.8 put on probably a Mario 5 or the Mario 5
912.48 canopy can be placed here. You mean so
914.8 you could you don’t need to buy couple
917.04 of VTXs for different sizes of quads.
920.24 That is a quick release system. For
922.0 example, the Pavo 20 Pro, you could just
924.72 actually put remove this, put this on a
926.72 Pavo 20 and put it on a Pavo Pico. And
929.04 what else did we forgot? Pavo Fento. You
931.519 could just put this because it is a
933.36 quick release system. I was hoping it is
935.76 the same for the Mario Mini or probably
938.32 SpeedyB is trying to make couple of
940.959 different sizes that will house this
943.44 quick release system. This is the only
945.36 probably the first one that they will
947.12 release. Hopefully because that is what
949.12 Beta FV did before for the Pavo Pico,
952.639 right? So hopefully as we go on they
954.88 will use utilize this quick release
957.44 system. But nevertheless, it flies
960.399 really well. I haven’t done any
962.0 freestyle because I had a bad
964.24 experience. Probably I’ll talk about it
966.56 on another video. So I’m so my fingers
970.56 are not that as it used to be wherein I
973.68 just want to fly and flick and flick. So
977.12 I do apologize if there is no freestyle
979.6 movement that I did on this video for
981.279 the Mario Mini. Just let me recuperate
983.6 and I’ll try to to do a couple of videos
986.16 about Mario Mini more. Let’s try to do
988.639 some flight. But nevertheless really
990.399 really good. probably the 2.5 in
992.639 propeller is giving it enough power in
995.199 efficiency. So you could fly it really
997.36 really long and you there is no actual
1000.639 problem while you fly this because it is
1002.56 in a freestyle configuration but there
1004.88 is a bit of prop wash as you dive. I’m
1007.6 not sure if there is a need to adjust
1009.839 the pid tuning of this. I was happy with
1011.92 the flight. So that is the Mario Mini 25
1015.279 and as always see you in the next video.
1017.44 Happy flying and take care. Bye-bye.
.